Getting Started in 3mm FAQ: Track Construction;
N. Brown
Constructing Track Using Plastic Chairs and Sleepers
There are various approaches to constructing your own track; here we concentrate
on just one of them, using plastic chairs, and plastic strip for sleepering.
However, much of it applies to the other approaches, the differences consisting
of fairly obvious detail which you can adjust for your own purposes. Remember,
what is described below is just one particular approach.
Plain Track
To see the basic principles, let's look at constructing a short piece of
straight plain track. It's useful to have some sort of plan or template on
which to lay out sleepering and rails. You can draw one out yourself, acquire
a template from some other source, or construct a template using software
such as Templot which is designed for the purpose.You can fix the plan on
your layout and construct the track in situ, or carry out the process elsewhere
and move the completed track onto the layout.
Here's a Templot template for a length of straight plain track attached
to a bit of MDF. The track can be constructed here then moved elewhere.
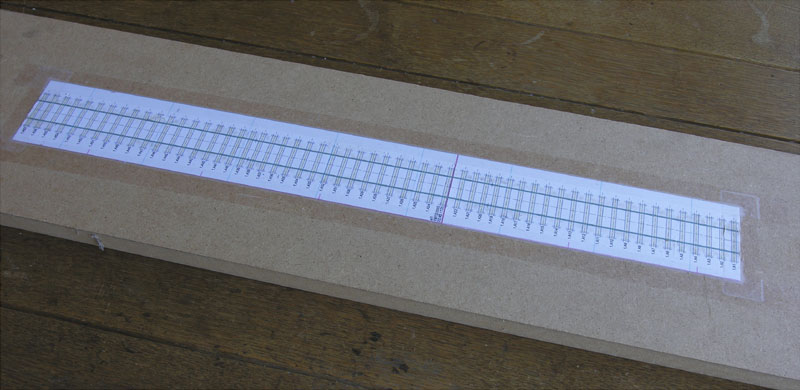
This particular one is for a maximum 18" length, the same length as Society
Code 60 track, but you can make it as long or short as you like. Virtually
everything to do with track (sleeper spacing, lengths, and so on) can be altered
to something you choose, but the defaults are often adequate.
Here are the basic components we will use.
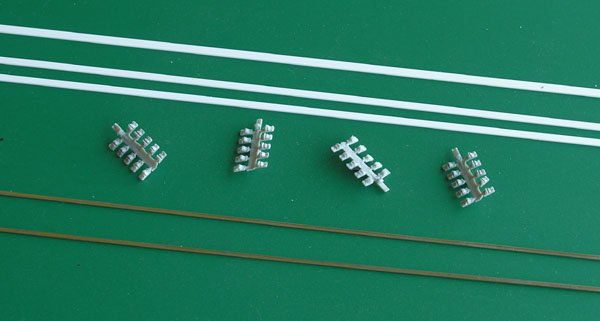
Evergreen or Plastruct strip can be used for sleepers and point timbers,
commonly 2.5mm wide for sleepers and 3.2mm for timbers (should be 3mm, but
they don't do that width and in fact the 3.2mm isn't quite that). The chairs
are Ian Osbourne's; on each sprue you get ten chairs plus one slide chairs
for points. The rail is Society code 60 bullhead, for which Ian's chairs were
designed.
To cut the sleepers to the right length, you could make a simple jig like
this.
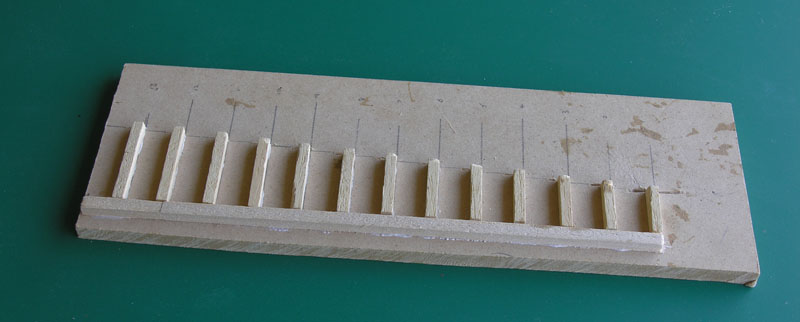
This one is designed to cut point timbers in steps of 6" (1.5mm),
starting at 9', and can also be used for 9' sleepers; what is needed depends
on your prototype and period. As an alternative you could use one of the
special model making guillotines available.
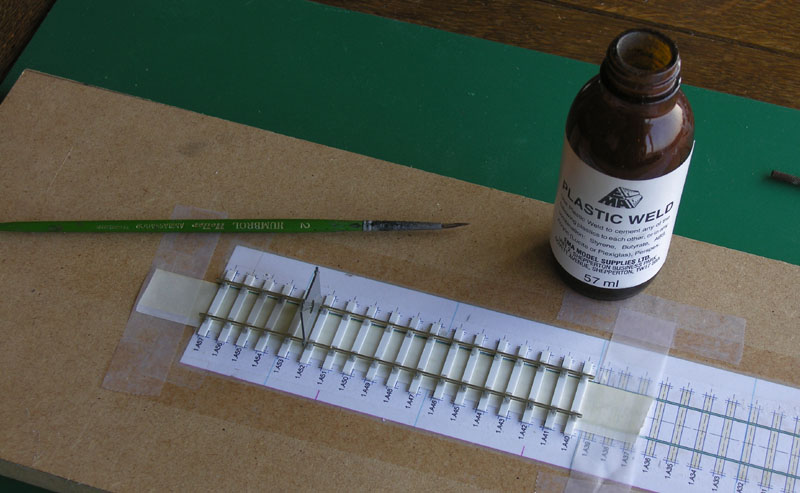
Here the work has started. A piece of double sided tape has been laid a
bit longer than the length of track required and fixed each end with magic
tape. Cut sleepers are being laid onto the tape in the required position,
the steel rule keeping the edges in line; even on curved track something
like this at the end of the sleeper is useful, as you can butt the sleeper
up against it before pushing it down onto the tape.
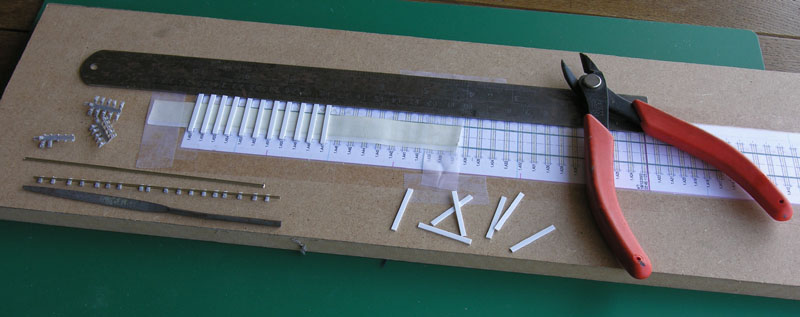
Also both rails have been cut to length, and one of them has had the required
number of chairs threaded onto it. To do this, first chamfer all edges at
the end of the rail so that the chair slides on easily. When threading chairs,
make sure the rail is the right way up, with the thicker bit at the top (bullhead
isn't symmetrical, and trouble threading chairs on probably means you've got
it upside down), and make sure the higher side on the chair is on the outside
(a bumpy ride on an apparently perfect bit of track probably means you've
got higher bits on the inside hitting the wheel flange).
Once the sleepers have been laid you can lay the first rail. Lay the rail
along the sleepers and adjust the chairs to align with the sleepers (check
again that you've got the higher side of the chairs on the outside). Then
work down the rail gluing each chair in turn, visually aligning the rail with
the plan underneath, and rechecking the position of each chair just before
you glue.
To fix the second rail, proceed as above but use your gauge or gauges
to get the right distance between the rails. Here one of Finney & Smith's
excellent gauges is being used.
When you've finished, cut away the part of the double sided tape being held
by the magic tape, to release the track panel.
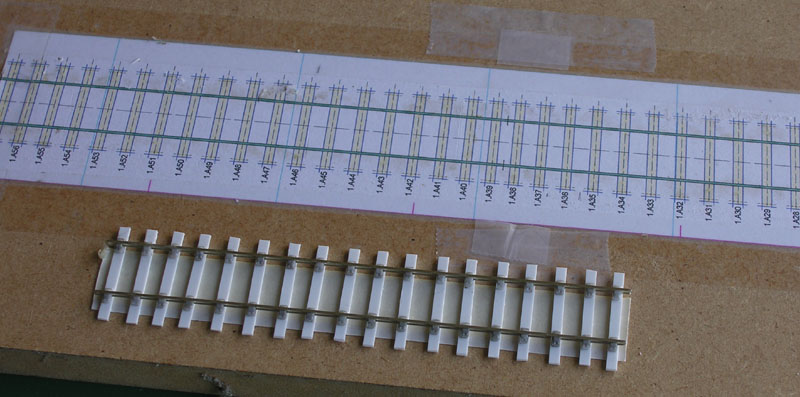
You can lay it in place on your layout by removing the backing tape and
sticking it down. If you want further security, white glue or track pins
can be used
Pointwork
Here we just take a very quick look at constructing pointwork. Once again
you can draw up your own plans, acquire templates from elsewhere, or use software
such as Templot to draw a plan. Here's a partially developed Templot plan
for part of a station throat (it needs some refinement to the timbering and
sleepering).
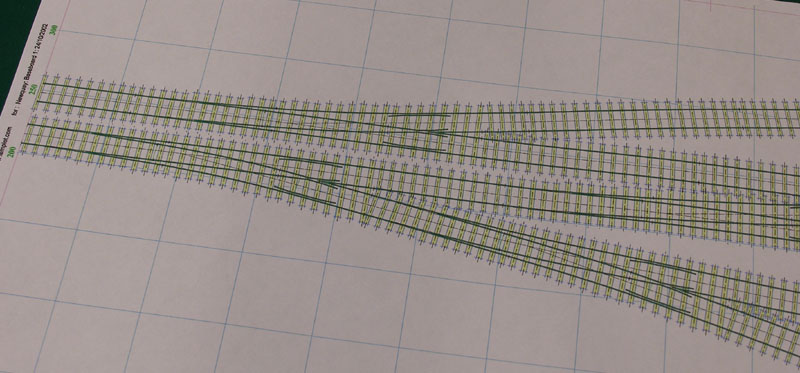
The additional work over plain track is fairly obvious. For the rails you
need to construct a crossing V, and also such things as tapered switch rails.
Ian Osbourne's chairs include slide chairs for use under the switch rails,
but for some other types of chair you'll need to modify the standard type,
quite easily done.
Here's the above plan constructed and laid in place, along with some other
track.
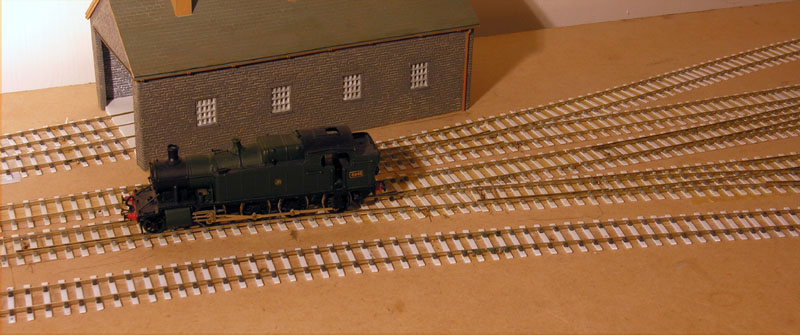
The pointwork here has all been constructed using plastic chairs and sleepering
throughout. Some people prefer to use PCB sleepers in critical positions to
give enhanced strength.
Other Approaches
You can easily use timber sleepers in place of the plastic strip described
above; the solvent will melt the base of the chair and allow it to penetrate
then grip the wood of the sleeper.
With PCB sleepers, you solder the rail directly to the copper of the PCB,
and also cut through the copper in appropriate places to ensure that the rails
are electrically isolated from each other where required.


